CDNetworks Documentation
Updating an Application
The following procedure describes how to update applications.
- In the left pane, click Applications.
- Click the name of the application you want to update.
- To update an application by editing the configuration file directly, click the top right Edit YAML button.
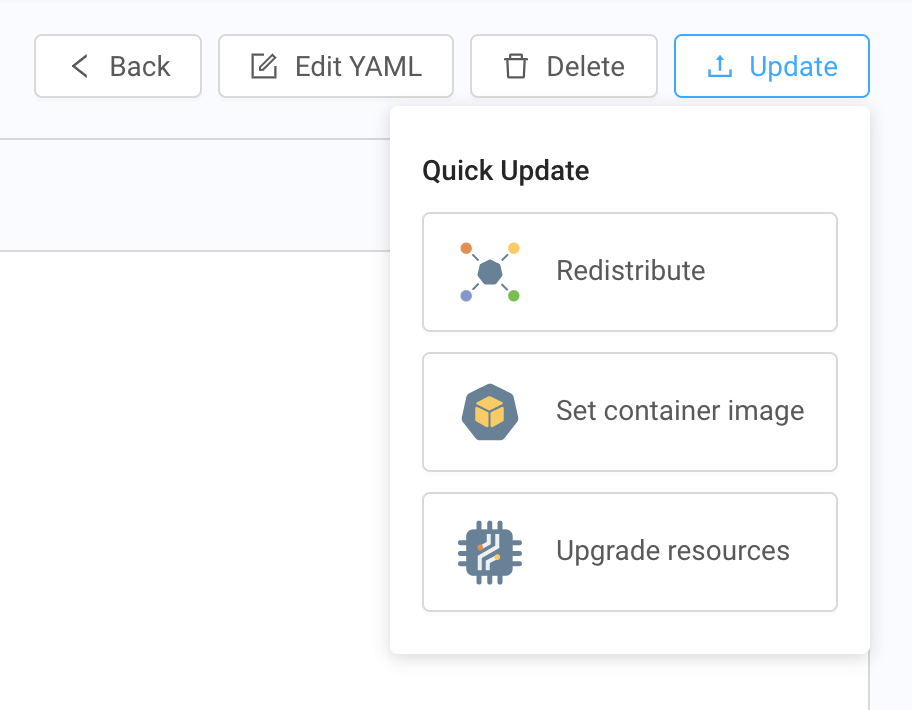
- To quickly update an application without having to touch the configuration file, click the Update button, select one of the following options, and refer to the appropriate section below:
- Redistribute allows you to add, edit, and delete distribution targets.
- Set container image allows you to update your pods to a newer application version.
- Upgrade resources allows you to upgrade the spec of your container instance to maintain performance and/or save costs.
Redistributing Your Application
If you select Redistribute from the Quick Update drop-down list, one of two dialog boxes appears, depending on whether you elected to distribute your application per region or per PoP when you created it.
Note: Before proceeding, observe the following behaviors:
- The redistribution method cannot be changed using the Quick Update feature.
- The application deployment process may take a while, the length depending on the size of container images to be downloaded, the target locations, and the number of expected instances, etc.
- When the ECP deletes pods in response to application scaling down or redistribution, persistent volumes attached to the pods, if any, will also be deleted.
Applications Distributed per Region
If your application is distributed per region, a dialog box similar to the following appears.
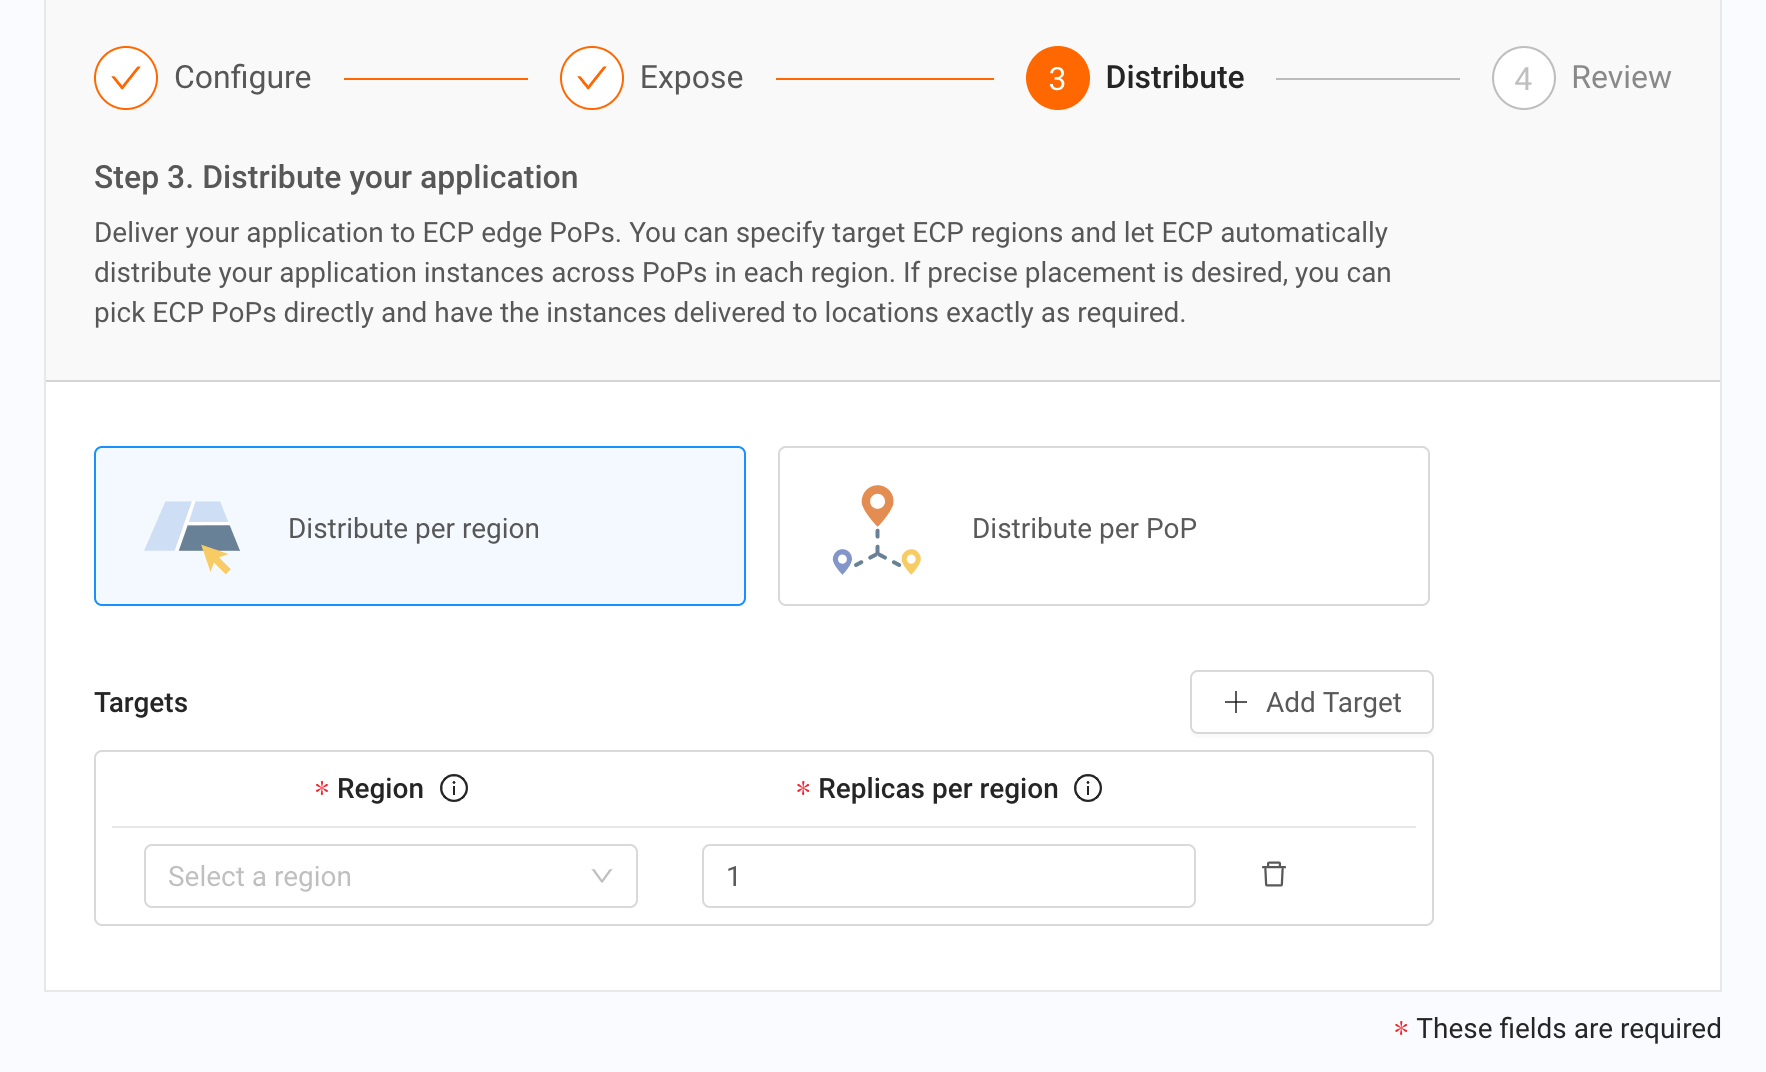
- Under Targets, accept or change the regions and replicas per region shown for existing targets.
- To add targets, click the + Add Target button. When a new row appears at the bottom of Targets, select a region and enter the number of replicas for that region.
- To remove a target, click the trash can icon at the right side of the target.
- When you finish, click Redistribute.
Applications Distributed per PoP
If your application is distributed per PoP, a dialog box similar to the following appears.
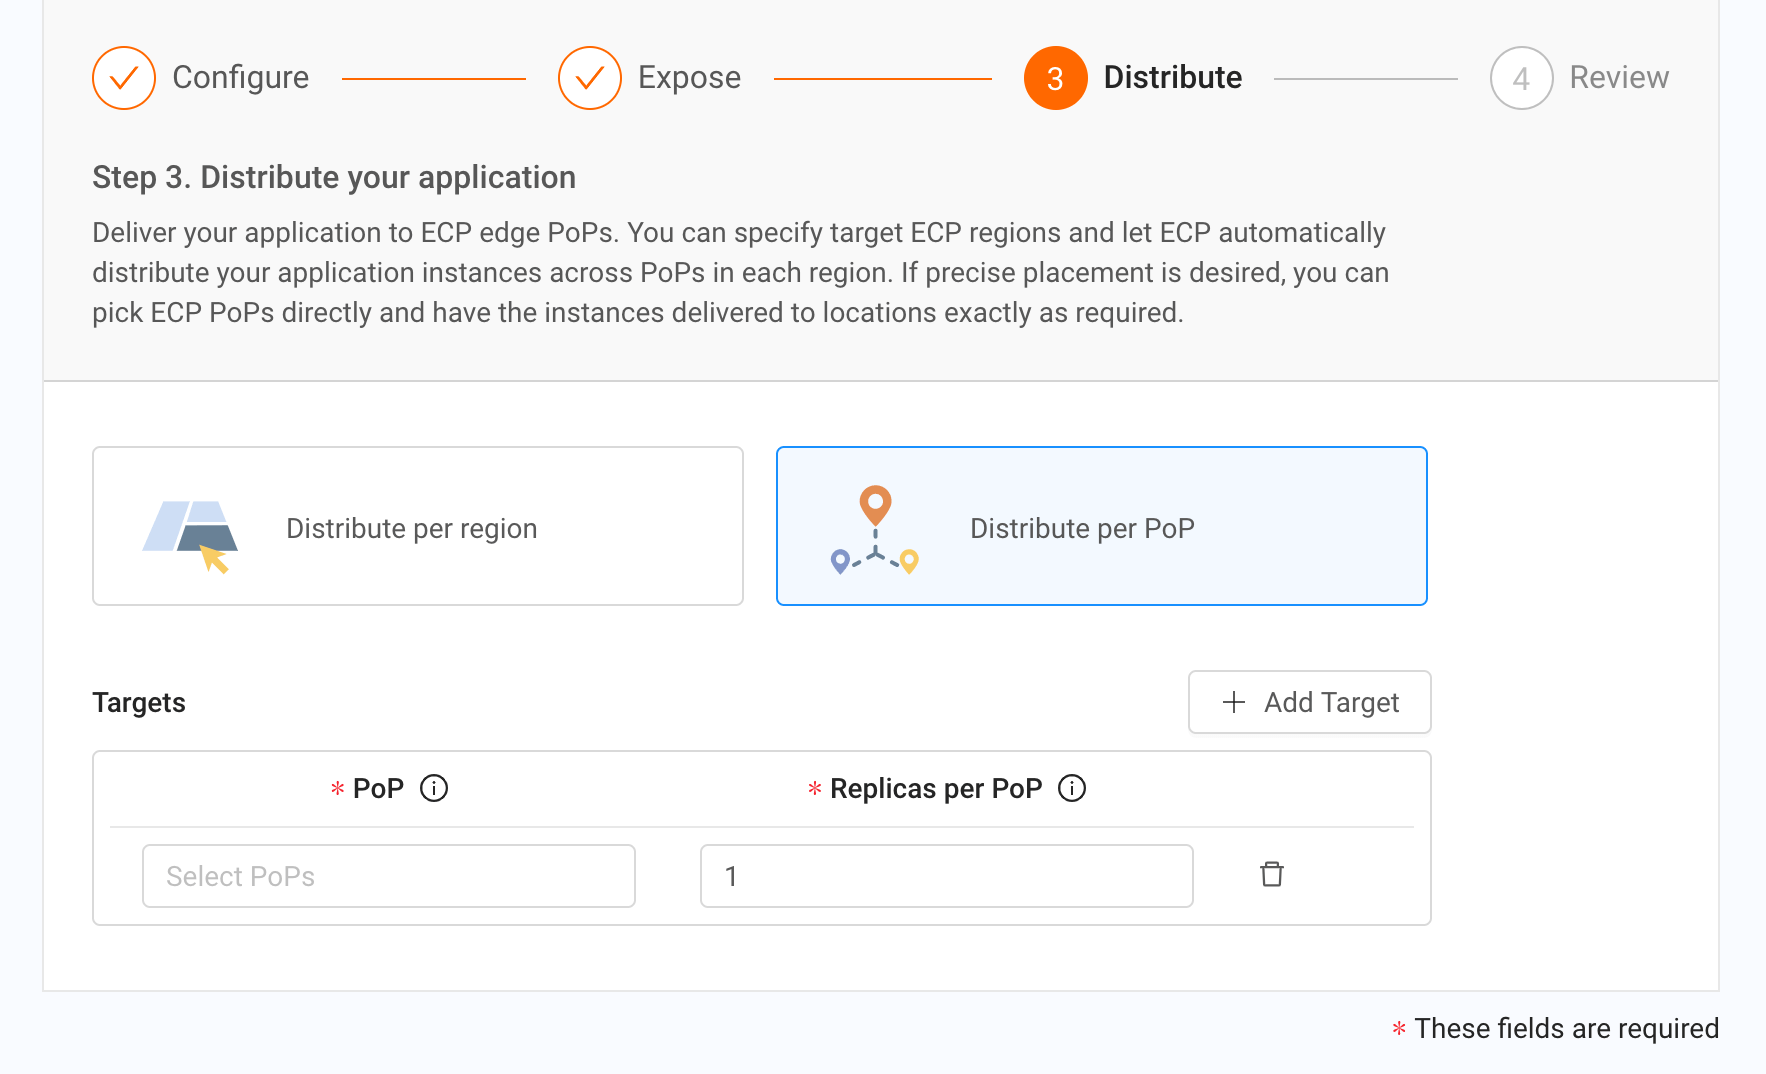
- Under Targets, accept or change the PoPs and replicas per PoP shown for existing targets.
- To add targets, click the + Add Target button. When a new row appears at the bottom of Targets, select a PoP and enter the number of replicas for that PoP.
- To remove a target, click the trash can icon at the right side of the target.
- When you finish, click Redistribute.
Setting Container Image
If you select Set container image from the Quick Update drop-down list, a Set Container Image dialog box similar to the following appears.
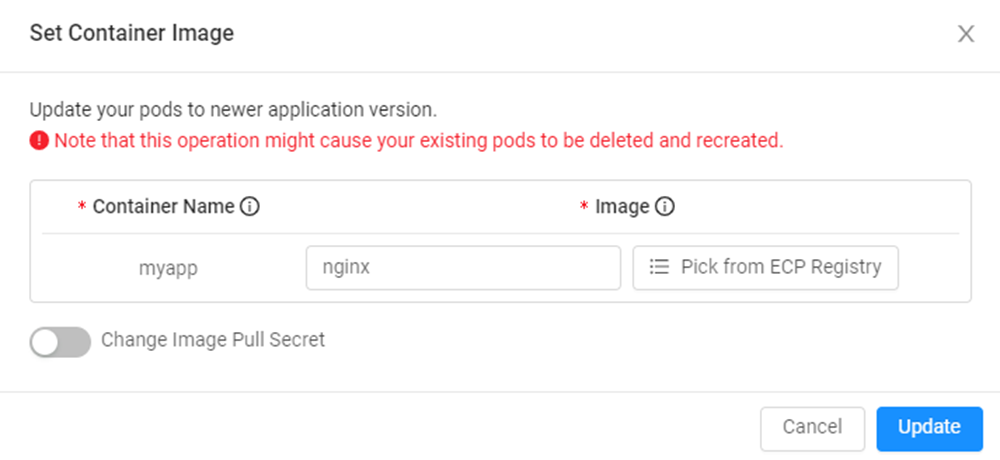
Note: This operation will cause your existing pods to be deleted and recreated.
- To change the Docker image name, replace the name in the Image field. Typically, this name consists of docker image registry, image, and tag. If the target image is stored in ECP registry, click Pick from ECP Registry to select from there.
- - If you omit the registry, the system defaults to docker hub.
- - If you omit the tag, the system defaults to "latest".
- - If your entry is not valid, the image pulling and application deployment fails.
- To change the image pull secret, drag the Change Image Pull Secret control to the right. Then click in the field displaying the current secret and select an image pull secret.
- To add an image pull secret, drag the Change Image Pull Secret control to the right. Click in the field displaying the current secret and select +Add Image Pull Secret. Complete the fields in the Add ImagePullSecret dialog box, and then click Submit.
- When you finish, click Update.
Upgrading Resources
If you select Upgrade resources from the Quick Update drop-down list, an Upgrade Container Spec dialog box similar to the following appears.
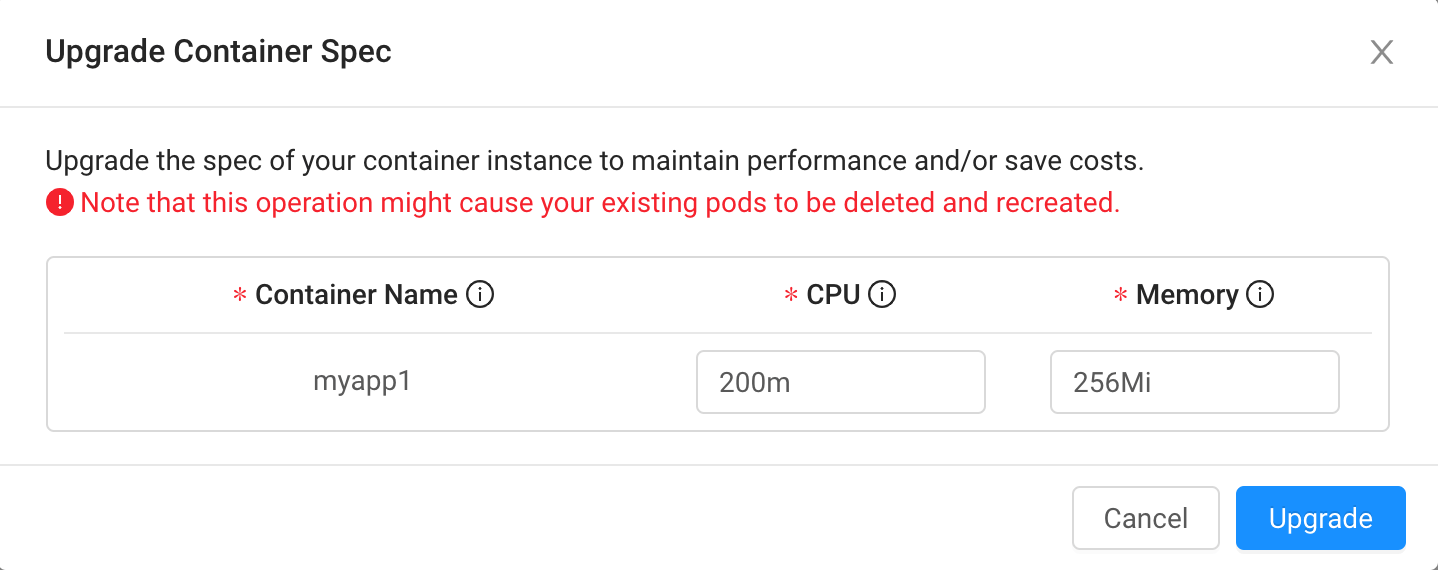
Note: This operation might cause your existing pods to be deleted and recreated.
- To change the number of CPU requests, enter a value in the CPU field. The value you enter is measured in cores. To specify millicores, add an m to the end of the value. Note: The CPU value should not be lower than 50 millicores, and should not cause the total amount of CPU requested by a pod to exceed 24 cores.
- To change the number of memory requests, enter a value in the Memory field. The value you enter is measured in bytes. To specify a different unit of measurement, add one of the following to the end of the value: G, M, Gi, Mi. Note: The memory value should not be lower than 50MB, and should not cause the total amount of memory requested by a pod to exceed 128GB.
- When you finish, click Upgrade.